In this blog post, you will learn some basics about GraphQL and how to start using it in an actual project with Java language and Spring Boot technology.
What is GraphQL?
GraphQL is a query language for APIs and a runtime for fulfilling those queries with your existing data. The main concept of GraphQL is strong typing which determines the way of communication between the client and server. GraphQL’s main feature is its flexibility, which can be determined on the basis of two phenomena that very often occurs when using REST architecture – data over and under-fetching.
Data Under-Fetching is a phenomenon that occurs when there is fewer data in response than the requester needs. This situation forces the client or other microservice to shoot the server whit another request to get the missing data.
Data Over-Fetching is a phenomenon that occurs when there is more data in response than the client or other microservice uses.
In both cases, there are performance issues that cause problems. In the first case, the client is forced to make additional HTTP requests when it should send only a single request in the ideal situation. In the second case, there is more usage of bandwidth than it could be, as the client is not using all the data that was received, which also slows down the application.
Against these problems, there is the GraphQL language, which thanks to the above-mentioned flexibility, i.e. the possibility of sending many queries within one request and the possibility of selecting the required fields within each request eliminates these two phenomena such as data under and over-fetching.
Basics of GraphQL
In GraphQL to create an API, it is necessary to create schemas that will define possible queries including what this query will return and what are the required parameters. There are two main concepts for operating on the data: Queries and Mutations.
Query in GraphQL is a substitute for HTTP GET in REST architecture and it’s used only to get data from the server.
Mutation is a substitute for HTTP POST/PUT/DELETE which is used to operate on data especially by sending new data to the server, updating already existing data, or deleting it from the server.
In each of the GraphQL operations, we have some keywords that allow defining schemas:
- type – represent a kind of object that it’s possible to fetch from service, and what fields it has. This keyword is allowed to use only in Queries.
- input – represents a kind of object that will make some changes in the server, allowed to use only in Mutations.
- interface – the abstract type that includes a certain set of fields that a type must include in implementing the interface.
- enum – enumeration types are a special kind of scalar that is restricted to a particular set of allowed values.
- union – very similar to interfaces, but they don’t get to specify any common fields between the types.
When defining schemas there are some predefined types like in other languages: Float, String, Boolean, Int, and new type ID which is a scalar type that represents some unique identifier.
Enough theory, let’s start with some practical stuff such as integrating GraphQL with Spring Boot.

To start it is recommended to use https://start.spring.io/ to initialize your project. There are some necessary requirements to do. The Spring Boot version must be greater or equal to 2.7.0 and at least two packages must be included: Spring Web and Spring for GraphQL.
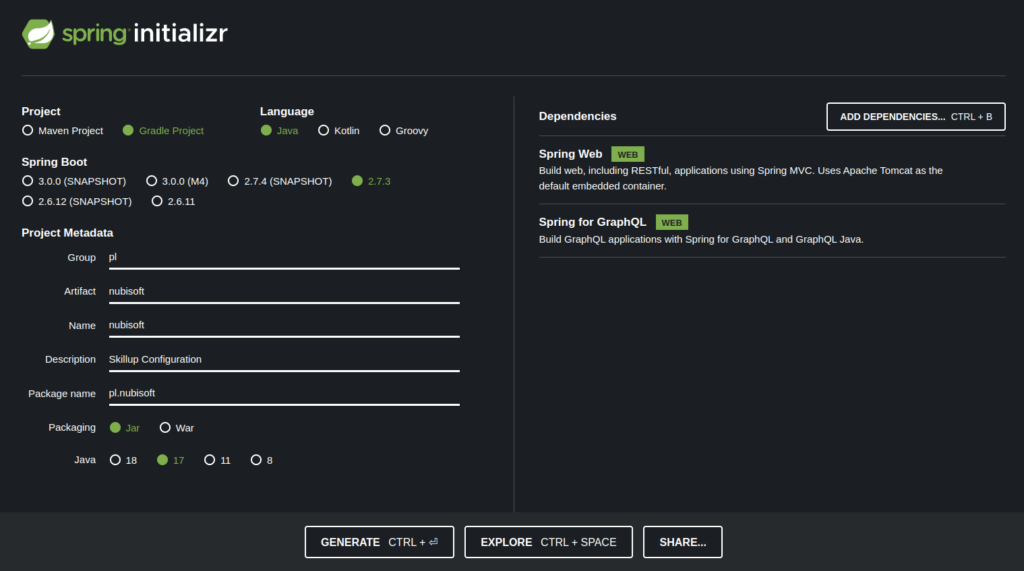
After successfully initializing your project if you are using IntelliJ it is also recommended to install a GraphQL plugin that will help with some stuff while coding.

Defining GraphQL schemas for our project
The scope of the project that we want to create for this lesson is to allow users to fetch all products and their details, and also filter products by price. There should be also some part of the functionality for admin users which includes adding, updating, and deleting products. In the first step of creating an API in the resources folder, we must create graphql folder which is the default path where schemas with .graphqls extension will be searched by the GraphQL library. Schemas could be separated into as many files as you want which is very helpful, especially in larger projects.

As shown in the above image I recommend creating a main schema file called schema.graphqls in which we will define available Queries and Mutations and also create a package for each domain (in this case only products) which will be separated into two schemas – one for Mutation inputs and one for Query types.
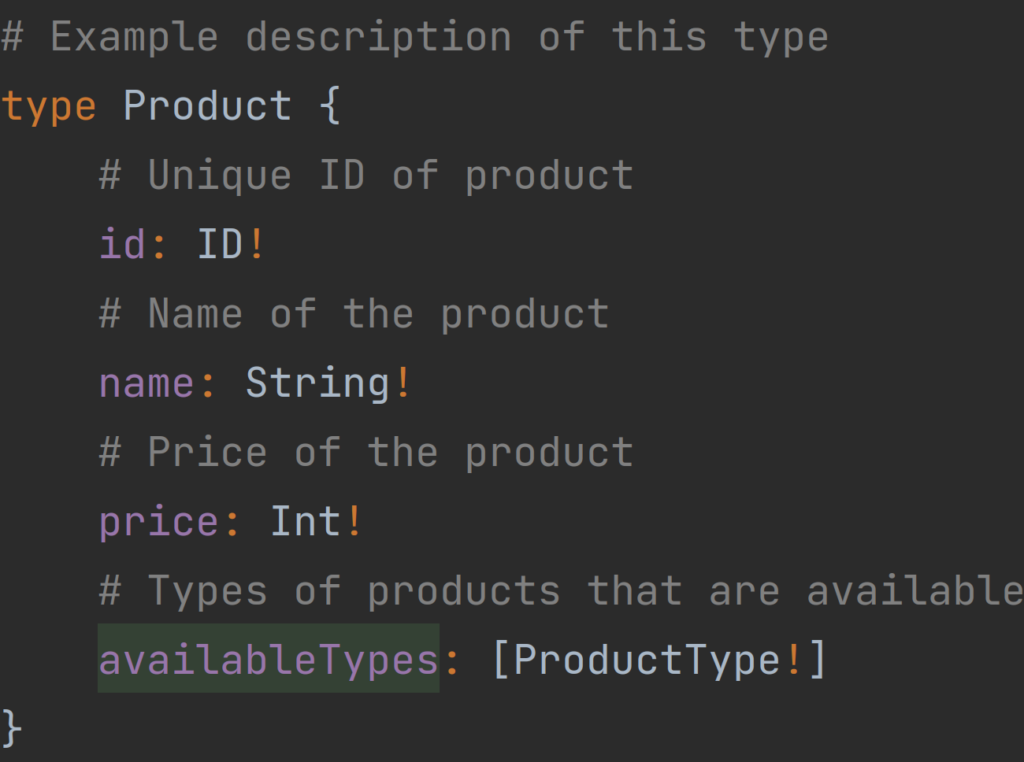
Let’s start with defining types for Query operations in the domain of the product:
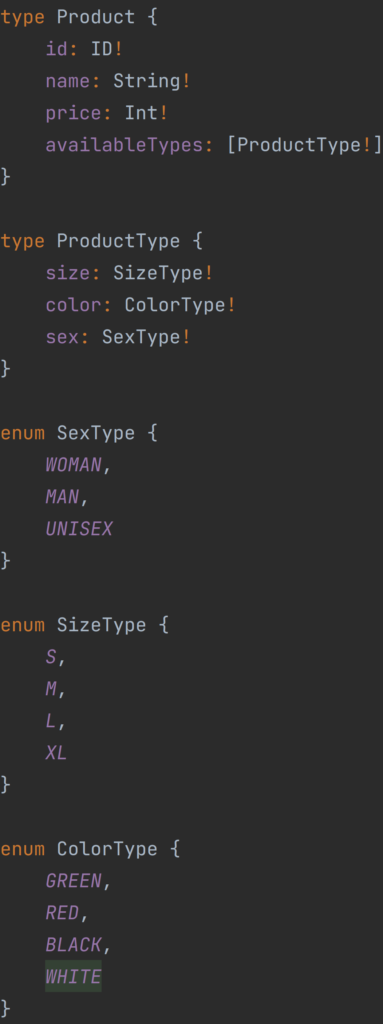
As you can see the type of Product consists of a unique id, name, price, and available types which consist of enums such as sex, color, and size of the product. Here you can also see two operators – ! and [], the first one informs us about the fact that this field can’t be null, and if it is, the server will respond with an error message. The second operator is used to define lists like in most programming languages. In that schema, availableTypes can be null, but because of ! after ProductType, elements inside the list of the available types will never be null.

As we have defined our types for the Products domain there is a time to define available Query operations. It’s worth remembering that in all schema files Query type must be defined only in one place.
Our available Query operations are products which will return a not nullable list of Product types with elements that also will never be null, product which takes not null unique id as a parameter and returns Product type, and the last one productsByPrice which takes two parameters priceFrom and priceTo which can be nullable, this operation will return a list of Product type.
After creating part of our schema we can move this to our Java implementation, by converting defined schema types to Java classes. If you won’t change any field after creating objects it is recommended to use records as it takes less code.
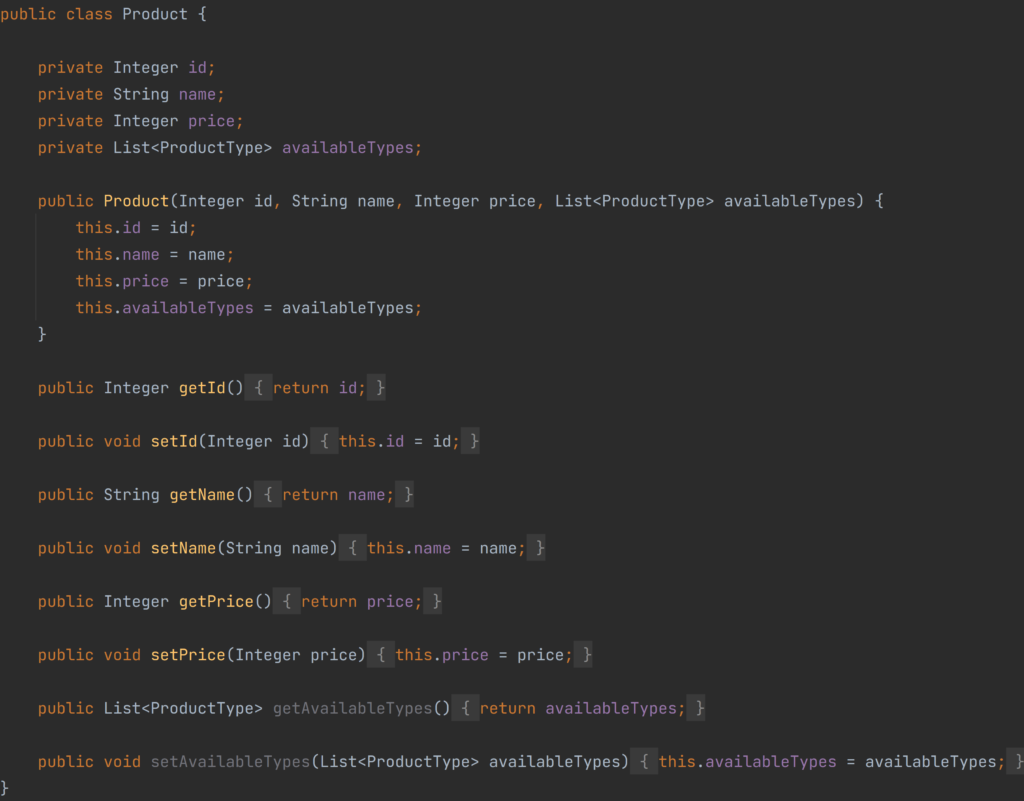


After moving schemas to classes we can start with implementing a Controller for our products domain.
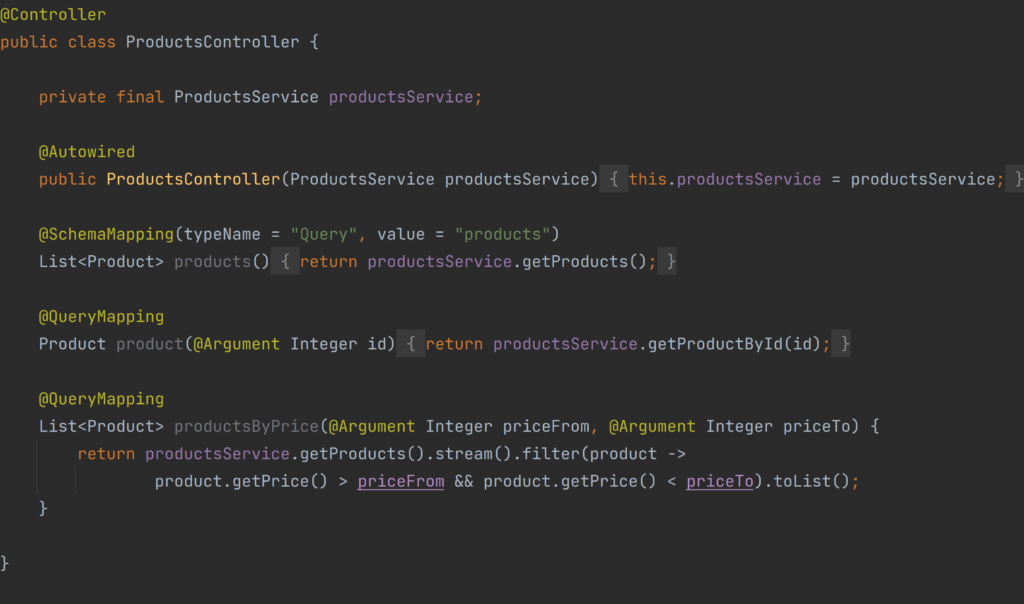
To create our Controller we need to annotate it with @Controller annotation from org.springframework.stereotype package. To handle our schema Query operations we have two possibilities. The first one is by using @SchemaMapping annotation in which we don’t have to be consistent in naming of methods and their corresponding schema operation, but it is necessary to pass at least two arguments to this annotation: typeName – in our case Query tells what kind of operation it is – and the value which should be the name of the schema operation. The second option is to use @QueryMapping annotation which under the hood is the former one but it binds schema operation with this method by its name, so it is necessary in that case to be consistent in the naming of methods and schema operations.
To take request parameters there is also @Argument annotation that maps fields into required types by name of the parameter.
Let’s move to define Mutations in the domain of the products.
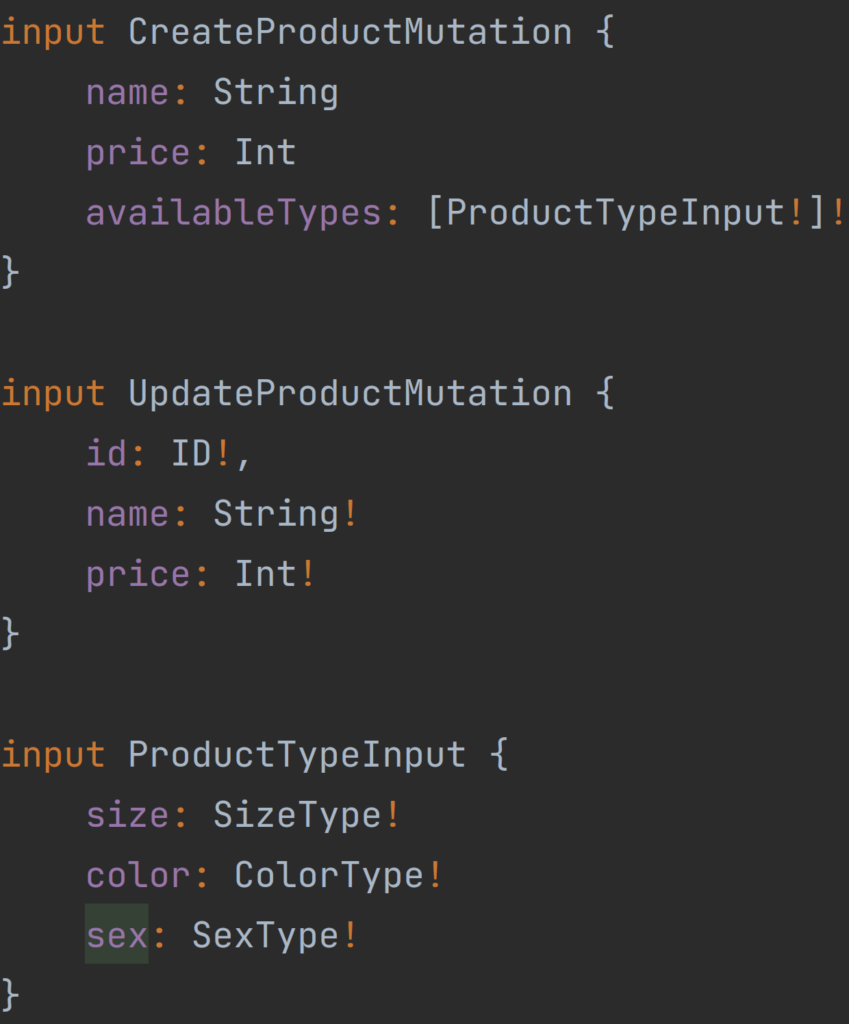
As mentioned above to define mutation types it is necessary to use the input keyword, types cannot be used here, but enums can be used between these two operations.

As we have defined our inputs for the Products domain there is a time to define available Mutation operations. It’s worth remembering that in all schema files Mutation, like Query type must be defined only in one place and all Mutation operations should return something.
Our available Mutation type operations are createProducts which takes as parameter CreateProductMutation input, updateProduct which takes as parameter UpdateProductMutation, and deleteProduct which takes as a parameter the unique ID of the product to be deleted. All of these mutations return the unique ID of the product on which they operate.


Again we moved schema inputs to the Java records, as mutations will not be changed. After that, we can add the handling of defined mutations in our ProductsController.
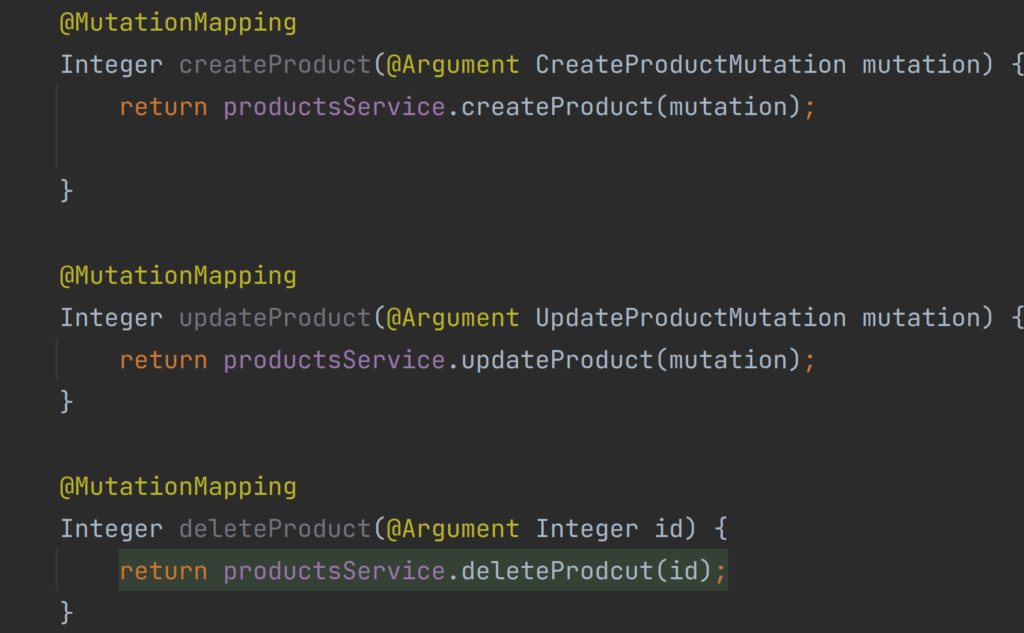
To handle our Mutation schema operations there is a specified annotation @MutatuionMapping which QueryMapping is under the hood @SchemaMapping. This annotation also requires to be consistent with operations defined inside schemas.
Testing API with GraphiQL
To test created API we can use Postman or another tool but the GraphQL library for Spring Boot has a built-in extension called GraphiQL to make it easier for developers.
To enable this extension it is necessary to add an entry in the application.properties file which is:
spring.graphql.graphiql.enabled=true
server.port=9000
After adding this entry and running our application the GraphiQL should be available at http://localhost:9000/graphiql?path=/graphql.
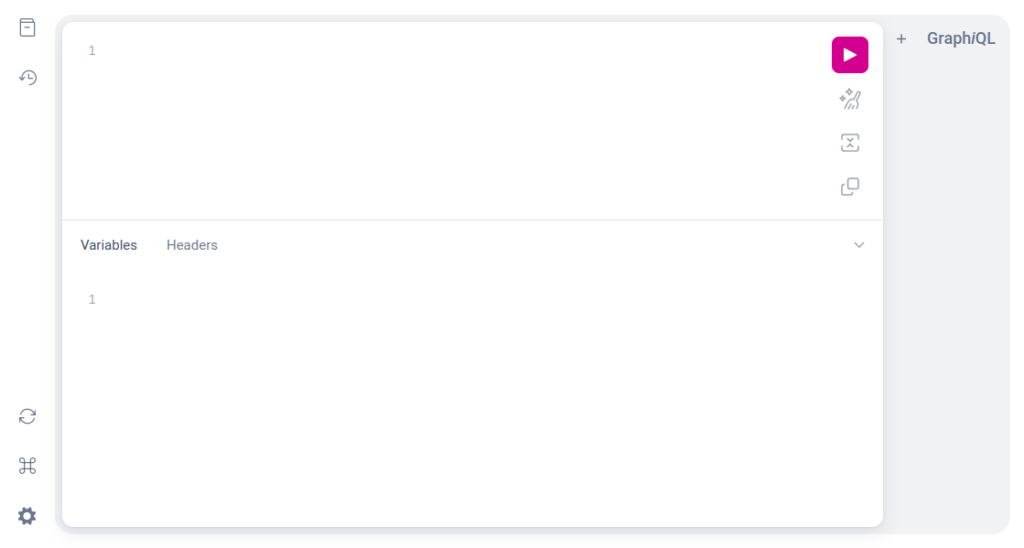
GraphiQL is the GraphQL integrated development environment that allows sending requests to the API. It contains built-in documentation which can be displayed by clicking the button on the left side of the window. Documentation is available by prefetching defined schemas, which allows for checking all possible operations, types and their explanations. It also provides suggestions when writing GraphQL requests, or the history of our requests.
By default, types defined in schemas have no description, but by adding # description above the type or field, we can add it to the documentation in GraphiQL, which can be useful in more complex types or business aspects.

Let’s make our first Query request with GraphQL:
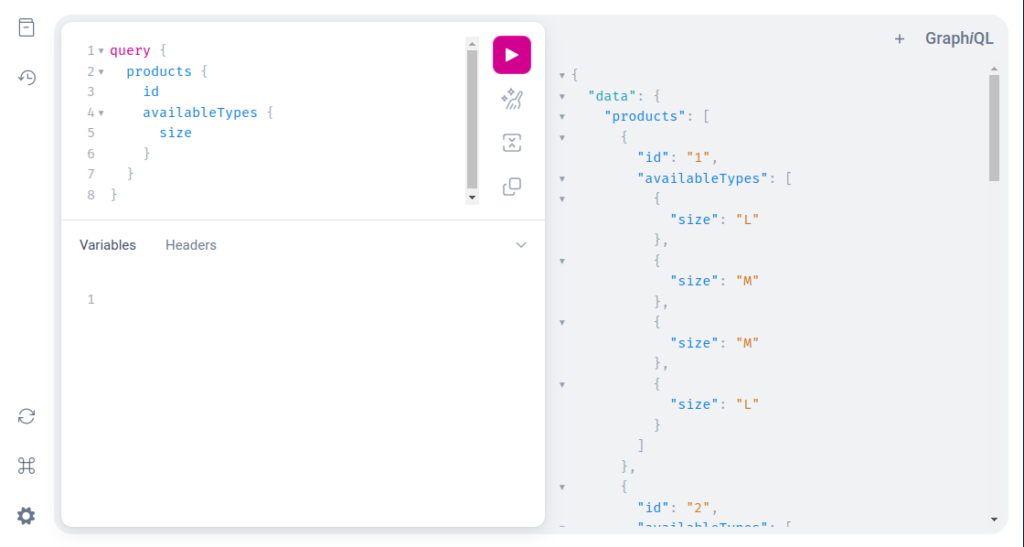
To send a Query to the server it should be wrapped inside the query keyword, after that by clicking ctrl + space, GraphiQL will suggest available operations to perform. As you can see in the products operation, we specify that we want only IDs and sizes of available types in the response; that is exactly what the server returns.
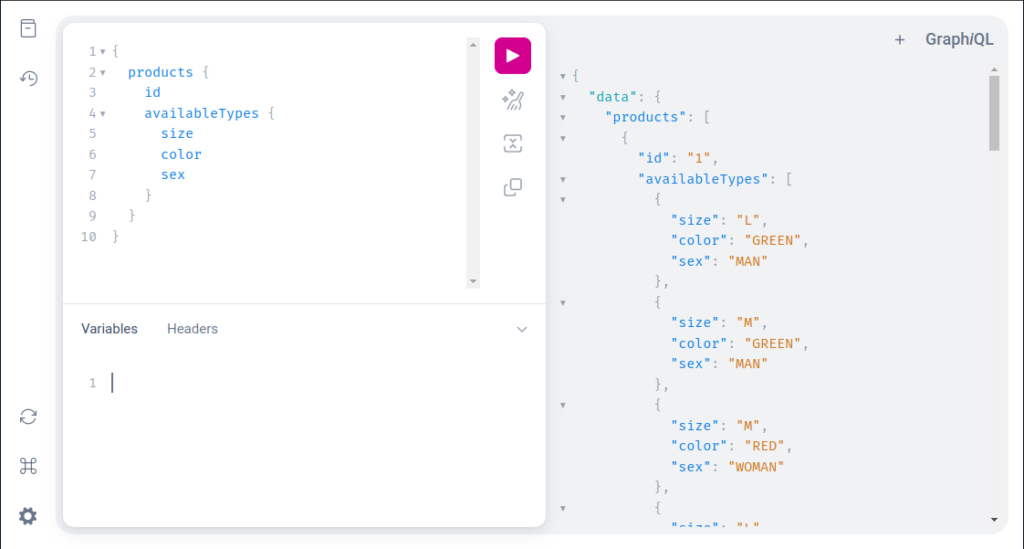
Here we can see the mentioned above flexibility of GraphiQL. The developer fully controls which fields will appear in the response, by adding their names based on the defined schemas.
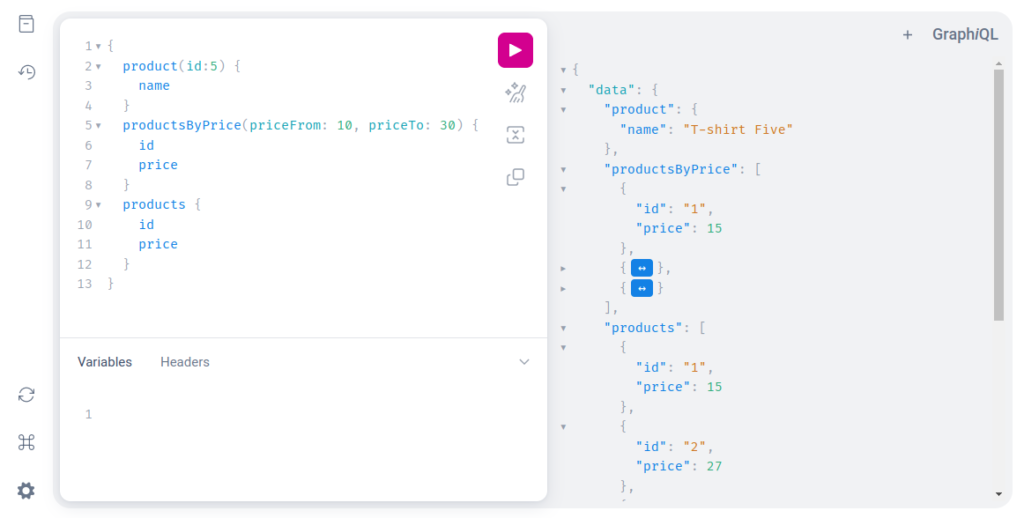
In this example, we are executing three operations with one query, which results in one response with all required data – details of products with id 5, products with a price between 10 and 30, and also all products.
Let’s move to our first mutation request:
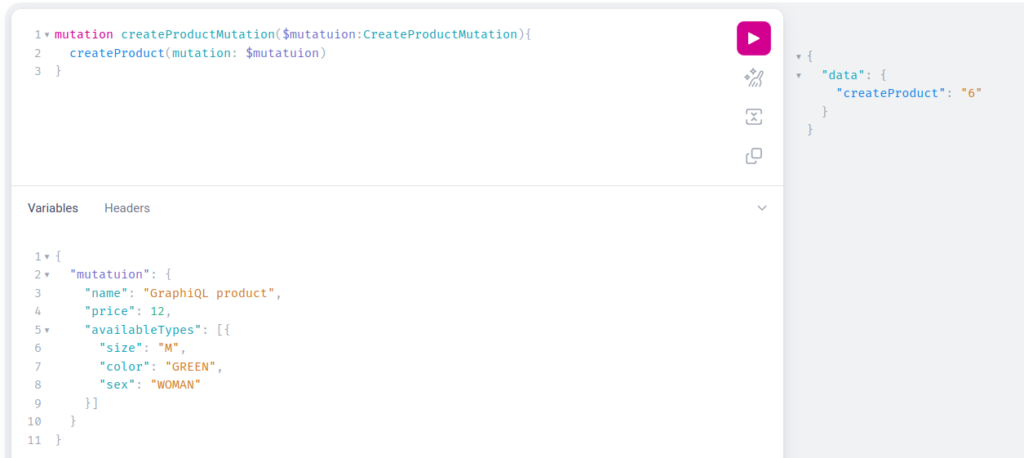
As it was for Queries, to specify our first Mutation all requests should be contained in the mutation keyword. As you can see in this example we are using the variables field, which in our situation is not relevant, but in real applications, it’s where actual data will be – we shouldn’t manipulate Query directly but only by the variables passed to it. In server response, we got the id of the created product so we can check if everything was saved correctly by fetching the product by its id:
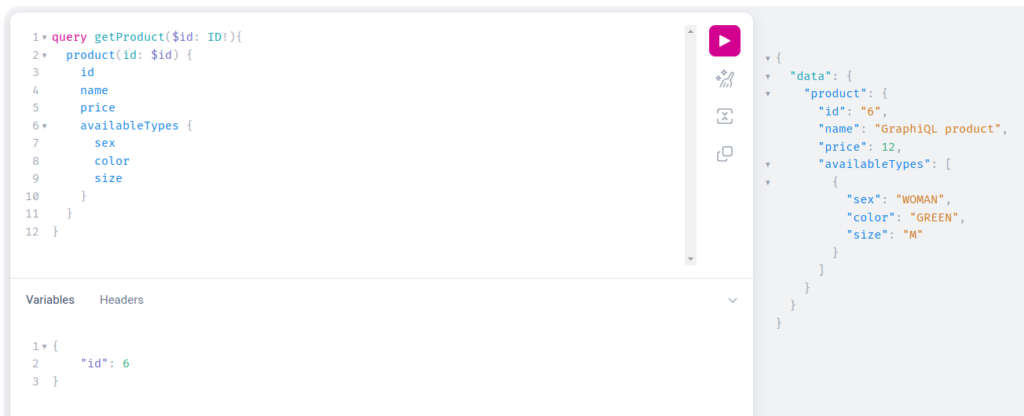
As you can see the product was saved correctly with all data passed as variables. Now we can try to update our product:
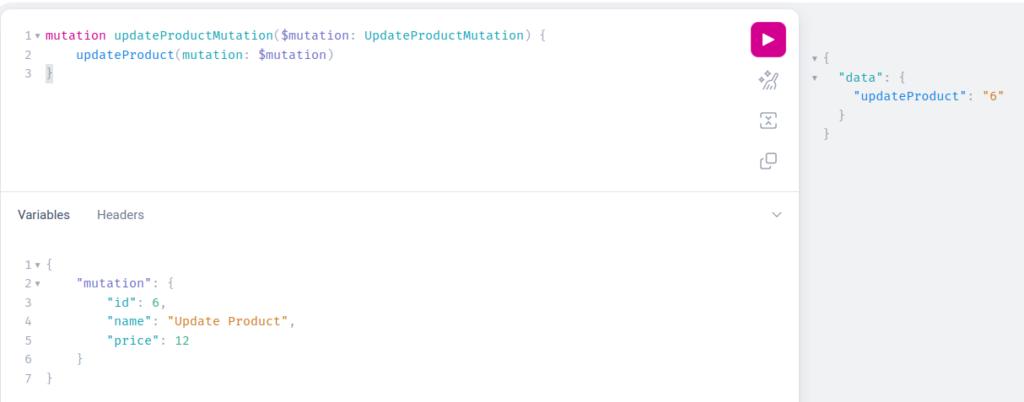
In this situation, we are also using variables to have a more generic way of sending update mutation requests. Lets again fetch our product to see that everything was updated as expected:
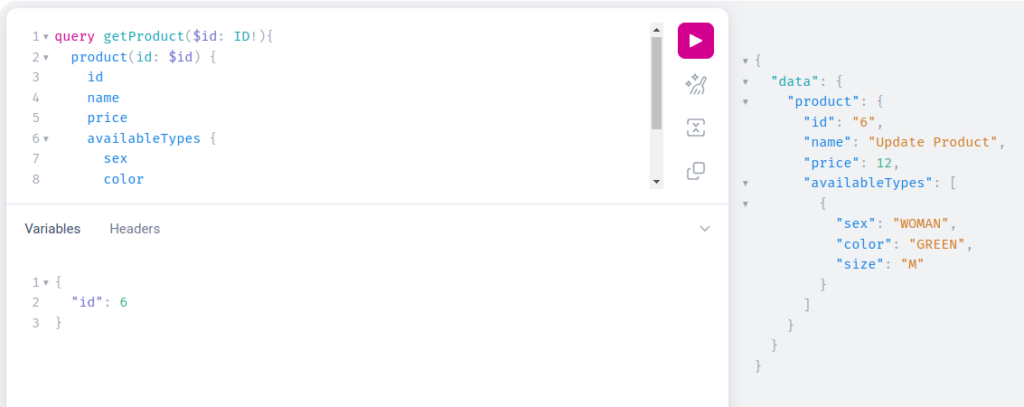
As you can see on the right side, the product was updated successfully. At the end of our journey we can try to delete a product that we created:
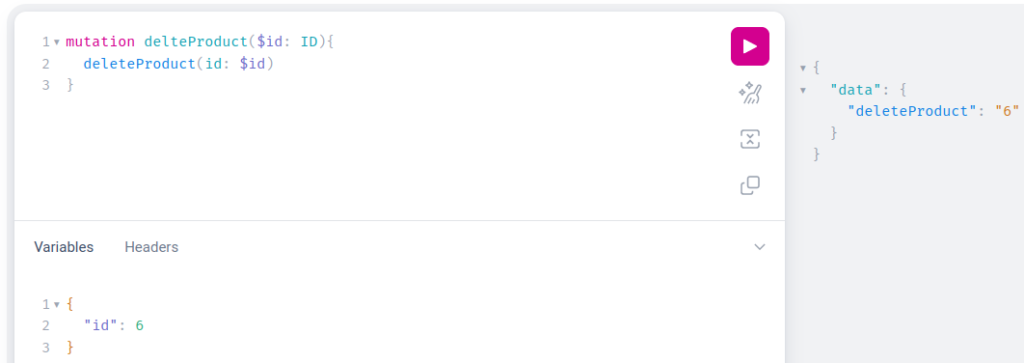
Let’s check what products are left in the system and ensure that the product with id 6 was removed:

As you can see there is no product with id 6, so we can say that product was deleted successfully.
Summary
GraphQL is growing rapidly and it is used in many production applications by companies of any size. It could become a ubiquitous technology for API in the upcoming years, but of course, it has good and bad sides. GraphQL is very flexible and allows to prevent two common phenomena observed in REST architecture such as data over and under fetching, by allowing to request only required fields and perform more than one query or mutation at once. One of the main problems of GraphQL is the “N+1 Problem” which occurs when GraphQL resolvers issue one query to the underlying data source along with N number of subsequent queries to fetch.
